

How to Make a Koosh Ball at Home — DIY Step-by-Step Guide
Making your own koosh ball is a fun hands-on project that requires just a few common materials and about 30 minutes of your time. Whether you’re recreating the classic bouncy toy for kids or exploring the satisfying tactile design as a craft, this guide walks you through each step.
We’ll show you two approaches: the rubber-band method, which closely mimics the original’s stranded texture, and the fabric-strip method, which works well for younger crafters. Both deliver that signature soft-spiky shape and gentle bounce.
Materials You’ll Need
For the rubber-band version, gather about 80-100 small rubber bands in assorted colors, a marble or wooden bead roughly 1 inch in diameter, and scissors. The bands should be thin enough to stretch easily but sturdy enough not to snap during assembly.
For the fabric-strip method, cut narrow strips of fleece, felt, or cotton jersey about 4-5 inches long and ¼ inch wide. You’ll need a foam or cork ball as the core — craft stores sell 1-2 inch diameter foam spheres that work perfectly. A hot glue gun or fabric glue will secure the strips.
Step-by-Step: Rubber-Band Koosh
Start by looping one rubber band around the marble or bead, then twist it once to create a figure-eight and loop it around again so both loops grip the core. This first band anchors everything.
Add the next band perpendicular to the first, using the same loop-twist-loop technique. Continue adding bands in different directions, spacing them evenly around the core. After about 20 bands the structure holds itself; keep layering until the sphere is full and the strands radiate outward. Trim any loose ends with scissors.
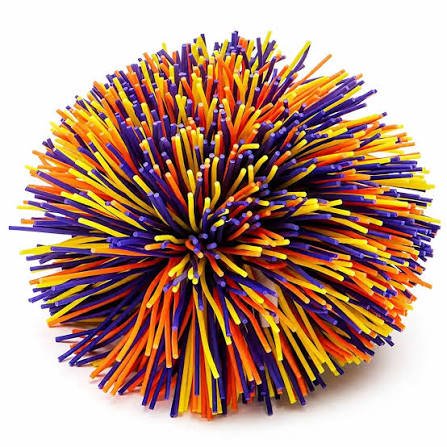
The result mirrors the construction originally used for koosh balls, where thin rubber filaments are anchored to a central core and spread in all directions.
Step-by-Step: Fabric-Strip Koosh
For Younger Crafters
This method skips the tension of rubber bands and works well with kids. Apply a small dot of glue to one end of a fabric strip, press it onto the foam core, and hold for a few seconds.
Repeat with the next strip, placing it at a different angle so the free ends fan out evenly. Continue gluing strips all around the sphere until the surface is covered. Fluff the loose ends with your fingers to create the soft spiky texture.
The fabric version won’t bounce like rubber, but it delivers the same tactile satisfaction and is easier for small hands to assemble.
Troubleshooting Tips
If rubber bands keep slipping off during assembly, your core may be too smooth. Wrapping the marble in a small piece of masking tape adds grip. Alternatively, start with a slightly larger bead that gives the first few bands more surface to grab.
For fabric strips that won’t stay put, increase the glue amount slightly or switch to hot glue for a faster bond. If the finished ball looks lopsided, add extra strips to sparse areas until the shape evens out.
According to Wikipedia’s entry on the koosh ball, the original design’s success came from evenly distributing filaments in a radial pattern — the same principle applies here.

Customizing Your DIY Koosh
Mix rubber-band colors in repeating patterns for a striped effect, or cluster similar shades on one half and contrasting ones on the other for an ombré look. Glow-in-the-dark bands add a fun twist for evening play.
Fabric crafters can experiment with different textures: fleece creates soft, fluffy ends, while felt holds its shape for a crisper look. Adding a small bell inside the foam core before gluing strips turns the ball into a sensory toy.
Start Your DIY Koosh Project
With just household materials and a half hour, you can create a bouncy, tactile toy that captures the spirit of the classic design. The rubber-band method delivers that signature stranded texture, while the fabric-strip approach offers a gentler, kid-friendly alternative.
Both techniques teach the same core principle: radial symmetry and even distribution create the koosh ball’s distinctive look and feel. Gather your materials, pick your method, and enjoy the hands-on process of building your own.
Notes
Plan for 80-100 small rubber bands to create a full, evenly-covered sphere. You can stop earlier for a sparser look, but fewer than 60 bands usually leaves visible gaps around the core.
Standard hair ties are too thick and won’t layer well. Stick with thin rubber bands sold in bulk packs — office supply stores carry them in assorted colors.
The rubber-band version bounces gently, though not as consistently as a factory-made koosh. The fabric-strip version is more of a tactile toy and won’t bounce at all.
For rubber-band balls, rinse under cool water and let air-dry. Fabric versions can be spot-cleaned with a damp cloth; avoid soaking them if you used hot glue, as the bond may weaken.
The fabric-strip method works well for ages 6 and up with adult supervision for the glue gun. The rubber-band version suits ages 8 and up, as it requires some finger strength and patience to layer the bands evenly.